Appearance
iOS Sample Application
The Sample Application (also abbreviated as "SampleApp") is a reference project for implementing an application based on the Binah.ai SDK.
Building the Sample Application
The following instructions are relevant for the Swift sample applications.
1. Open the Sample App "xcodeproj" in XCode
Trying to build the project will result an error No such module 'BinahAI'. This will be solved after completing the following steps.
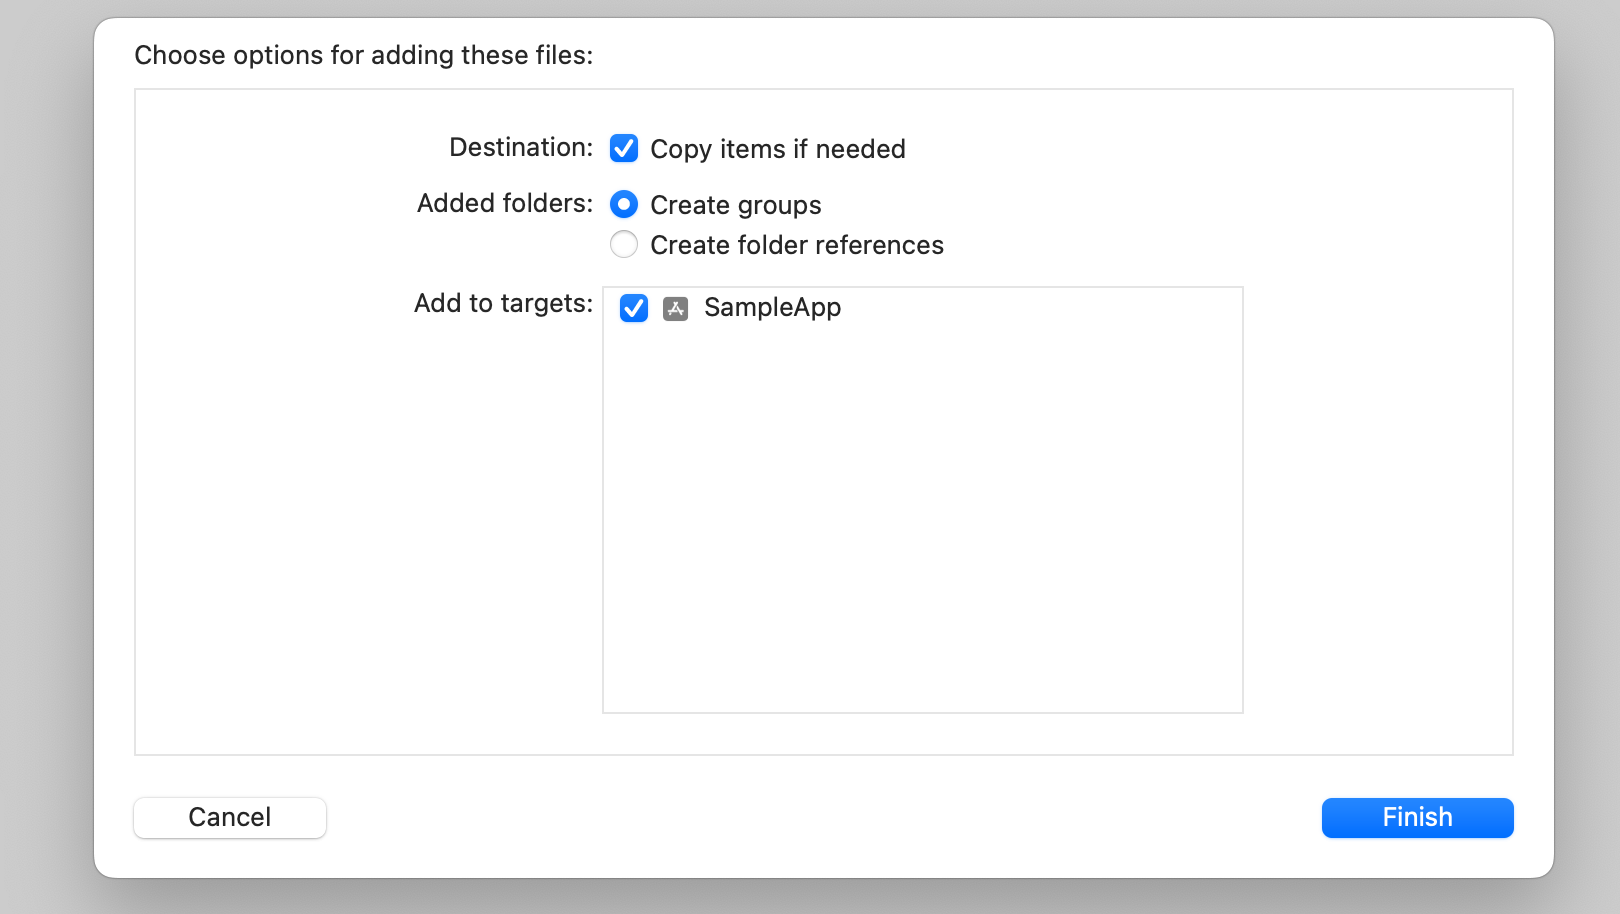
2. Add the Framework to your Project
- Create a Frameworks directory under your project root.
- Copy the BinahAI.framework into the Frameworks directory.
- Drag and drop the BinahAI.framework file into your Xcode project.
- Ensure that the Copy items if needed checkbox is checked, and that your app target is checked in the Add to targets section.
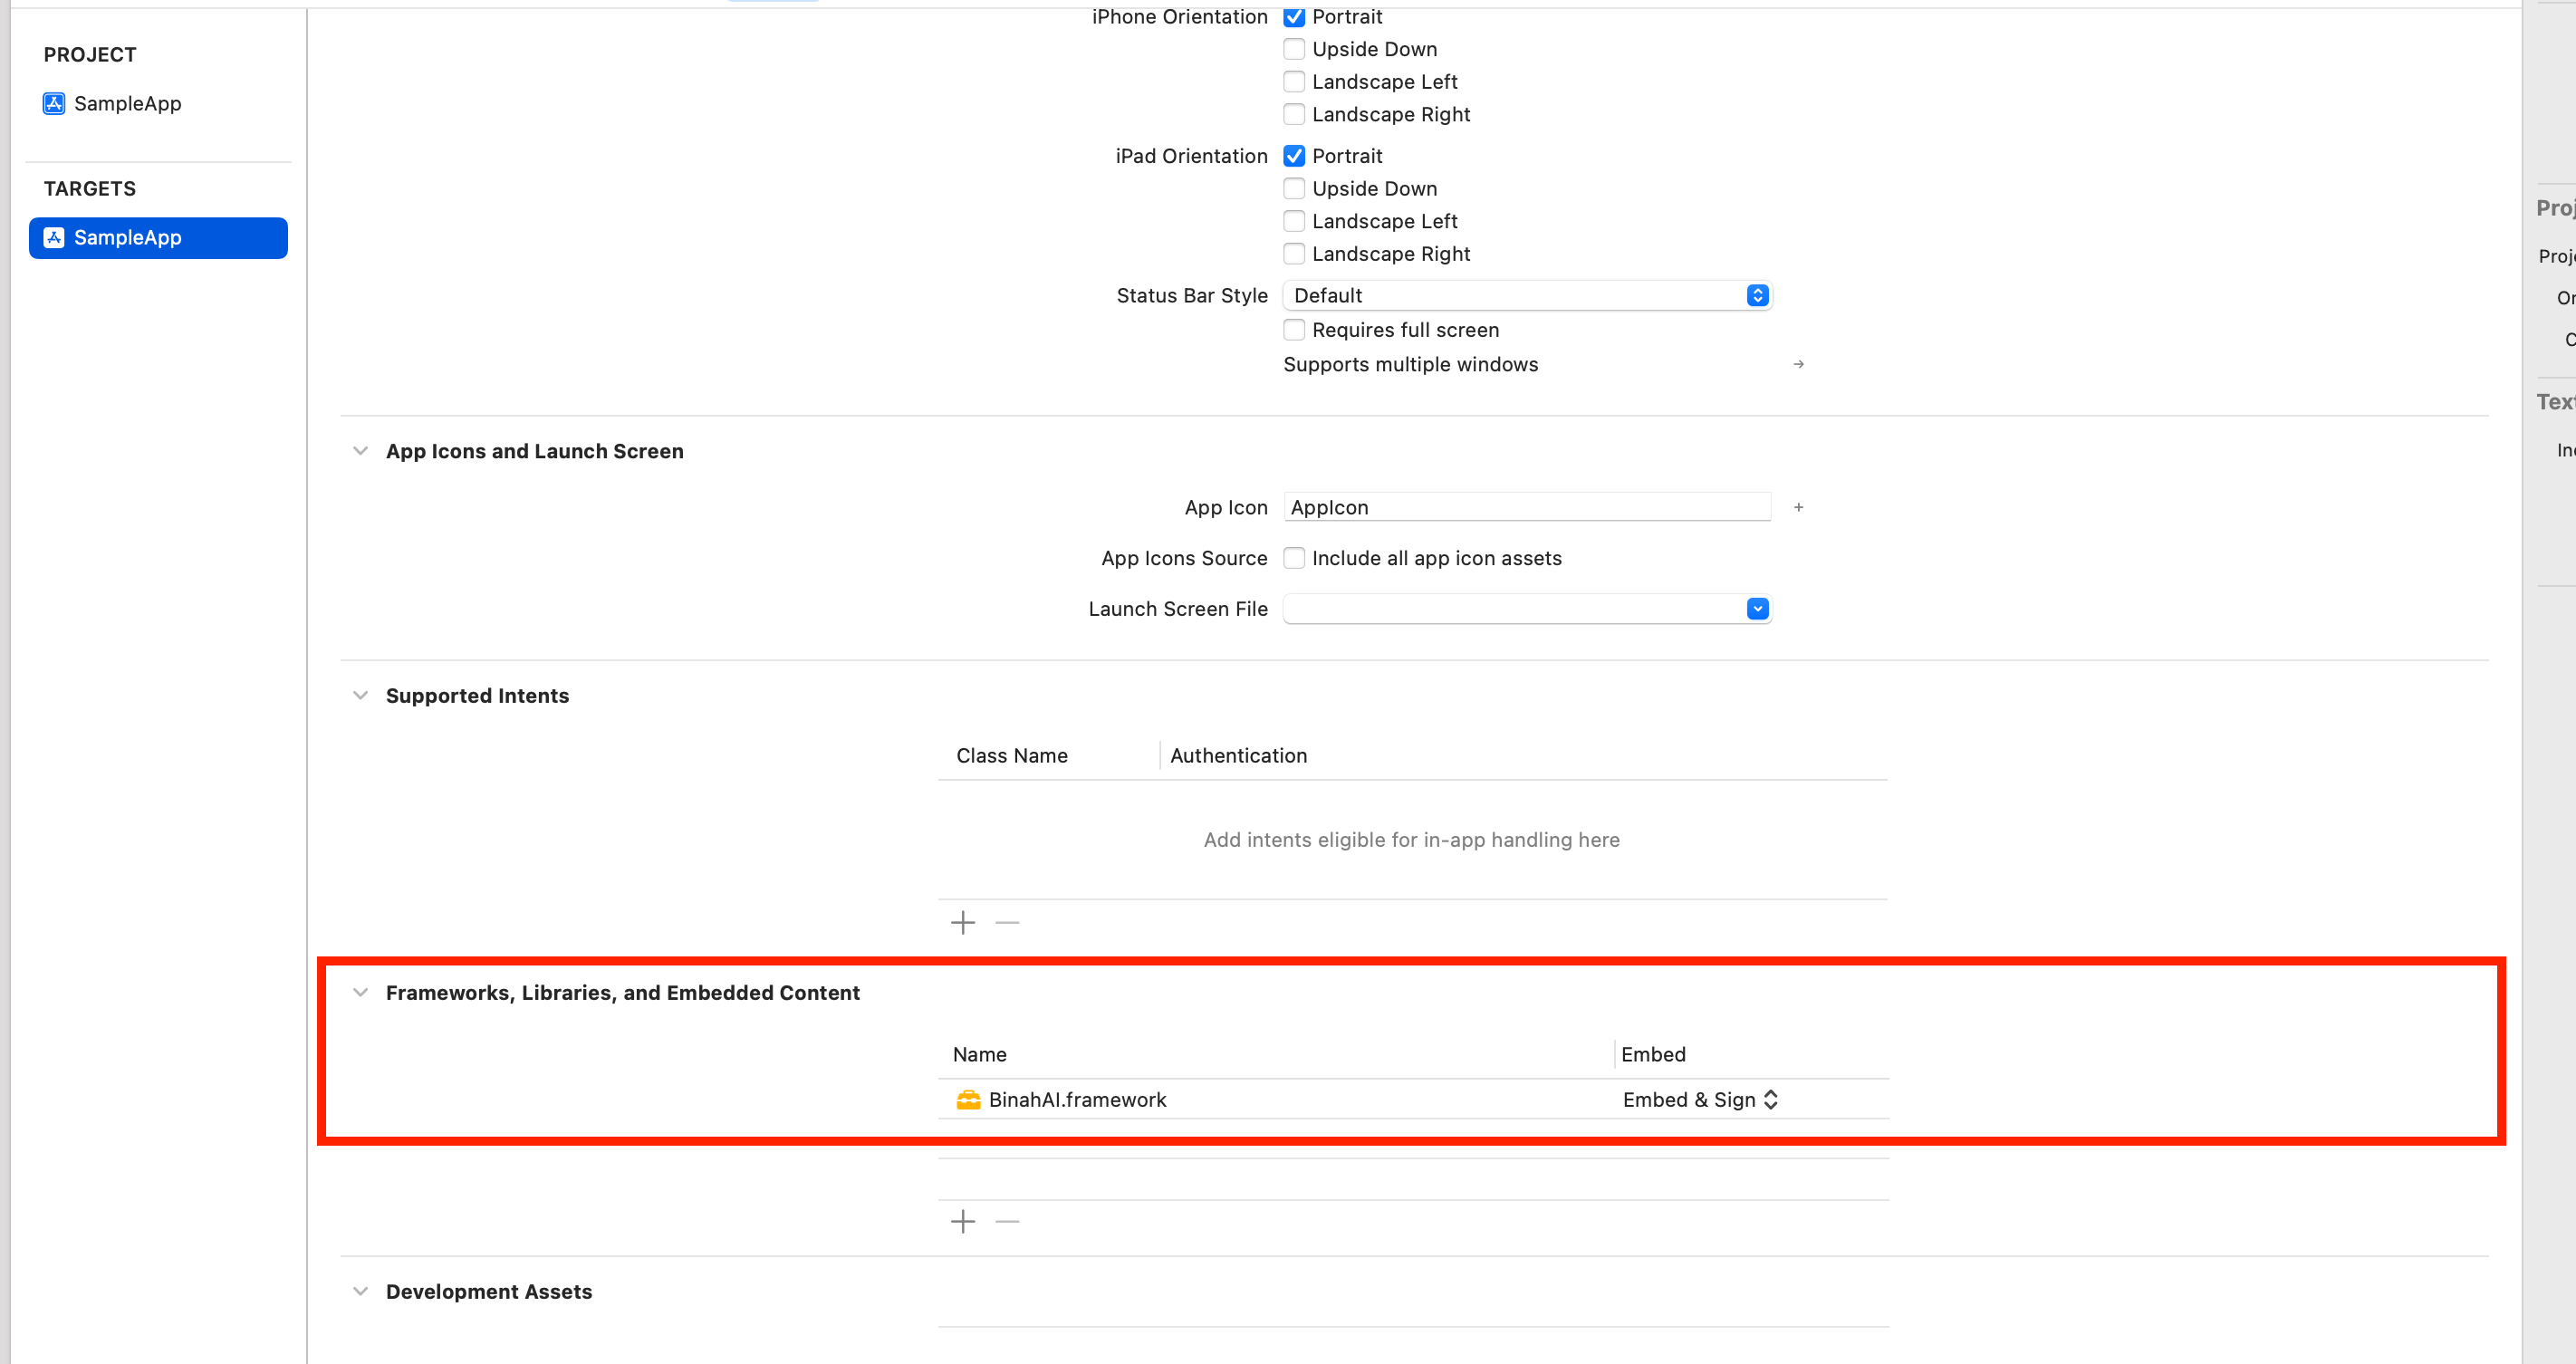
3. Embed the Framework
The BinahAI Framework must be embedded in your application in order for the app to use it. Follow these steps to embed the framework in your application:
- Select your app target in the project navigator.
- Select the General tab.
- Scroll down to the Frameworks, Libraries, and Embedded Content section.
- Ensure that the BinahAI.framework is set to 'Embed & Sign'.
4. Build the Project
Build the project. The build should succeed, without resulting in the No such module 'BinahAI' error.
5. Set the License Key
- Open ViewController.swift.
- Replace the
<ENTER_YOUR_LICENSE_KEY>string with the license key that you received from Binah.ai.
Swift
class ViewController: UIViewController {

    private static let licenseKey = "<ENTER_YOUR_LICENSE_KEY>"
    private static let measurementDuration = UInt64(60)

    ...
}
6. Configure the Measurement Duration (Optional)
- Open ViewController.swift.
- Update the value of
measurementDurationwith a value between 20 to 180. The value represents the measurement duration in seconds. The sample application allows the user to stop the measurement before the defined measurement duration.
Note
Each vital sign has a minimal measurement duration that is required for calculating its value. Refer to the Report Timings page.
Swift
class ViewController: UIViewController {

    private static let licenseKey = "<ENTER_YOUR_LICENSE_KEY>"
    private static let measurementDuration = UInt64(60)

    ...
}
7. Run the Application
Now the application is ready to run.
- Connect an iPhone or iPad to your computer.
- Click the Start button.
- When asked, allow Camera Access.
Measuring Vital Signs
- Position your face in the center of the camera preview.
- Click the Start button and verify that you see the face detection graphics (bounding rectangle).
- Pulse Rate vital sign values (this is an example of an "instantaneous" value) should be received after approximately 11 seconds.
- After the measurement stops (either by tapping on the Stop button or at the end of the defined measurement duration), an alert with the Pulse Rate and Mean RRi results will be shown (this is an example of a "final" result).
- The final results can be N/A in case of insufficient measuring time.
- Also see the following relevant pages:
- Best practices on how to take a measurement
- SDK Accuracy Targets and Report Times
- SDK Alerts